


Help Desk
03 July 2025 10:47 PM

How to use Eudora to send and receive your emailHow To: Email Configuration
|
Once you have chosen Eudora as your email program, you can use the following step by step guide to help you configure it with the proper settings.
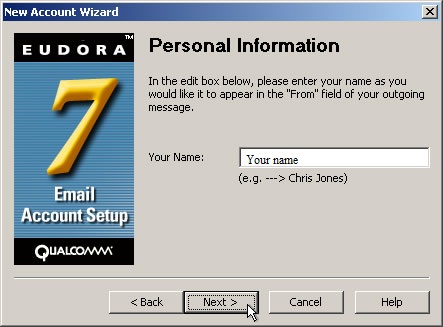
  Enter a name for your email account. This name will appear in the "From" field in your outgoing messages. Once you have typed a name, press "Next >."
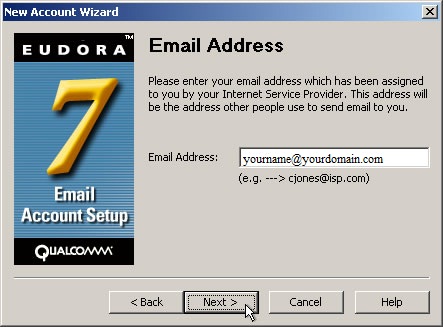
 Next enter your email address. Click "Next >."
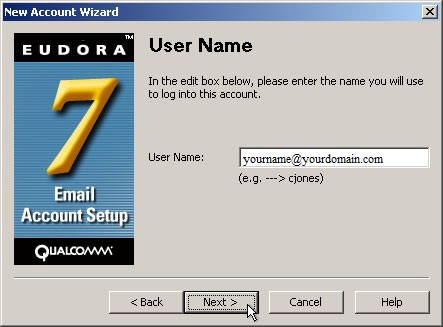
 Enter your User Name. This is the same as your email address.
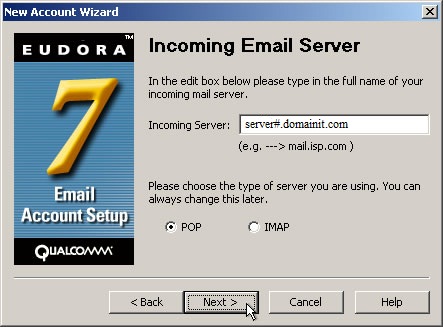
 Next enter the Incoming Server, which is "mail.domainit.com." Make sure that the server type is selected to "POP." Click "Next >."
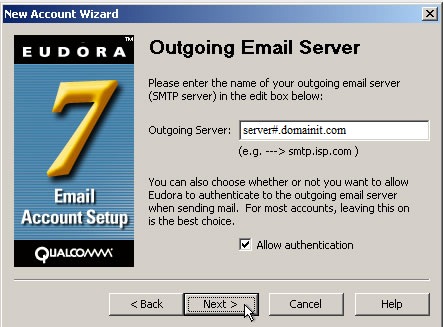
 Next enter the Outgoing Server, which you should obtain from your internet service provider. "Allow authentication" checkbox checked. Click "Next >."
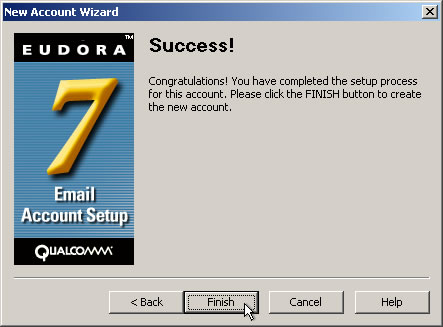
 You're done! Click the "Finish" button.
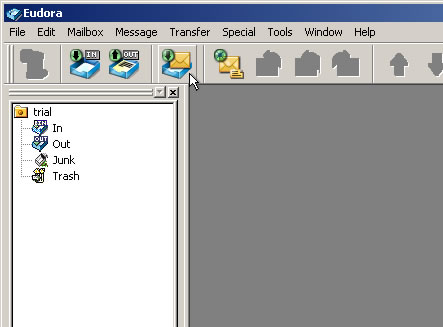
 To begin sending and receiving email, click on the "Check Mail" icon, which is the fourth icon from the left.
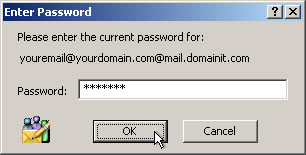
 Next your will be prompted for your password. Enter the password which you chose when you registered this email account.
 You should now be able to send and receive email.
| |
|
|
|
 Launch Eudora. If you are a new user, the New Account Wizard should automatically prompt you to help you through configuring your settings. Click "Next >" to begin.
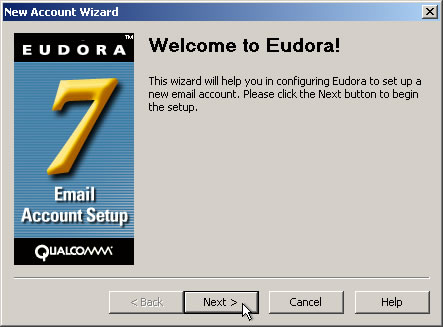


home :: account manager :: domain names :: web hosting :: email :: search engine submission :: website tools
about us :: testimonials :: affiliate program :: support :: contact us :: site map
© Copyright 1996-2025 DomainIt. All rights reserved. Service Agreements