


Help Desk
18 July 2025 07:06 PM

How to use Outlook Express to send and receive your mailHow To: Email Configuration
|
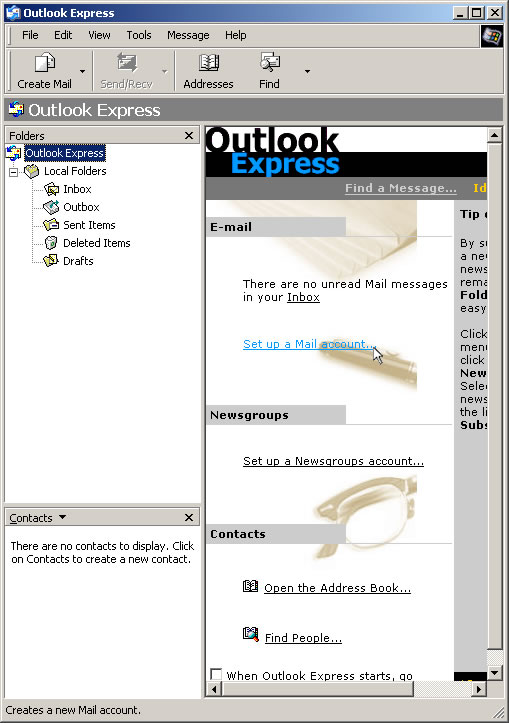
1. Launch Outlook Express. You should see a link, displayed below, titled "Set up a Mail account." Click this link to open the Internet Connection Wizard. If you do not see the link, you can access the
Internet Connection Wizard by going up to the "Tools" menu and selecting "Accounts...." Next click on the "Add" button and select "mail."
If you get an error that states "connection refused" then your ISP may be blocking the default port number for your outgoing mail server. If your ISP happens to block the default port number (port 25), you can use port 26 as an alternative port number.
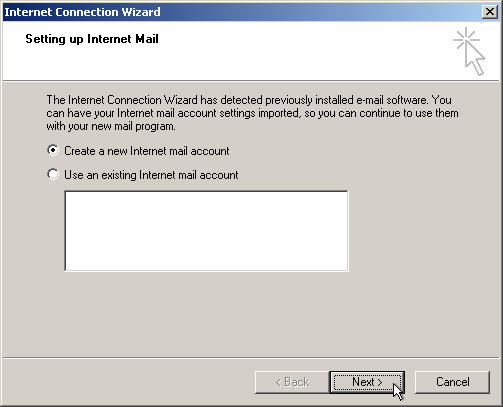
 2. Select "Create a new Internet mail account." Click "Next >."
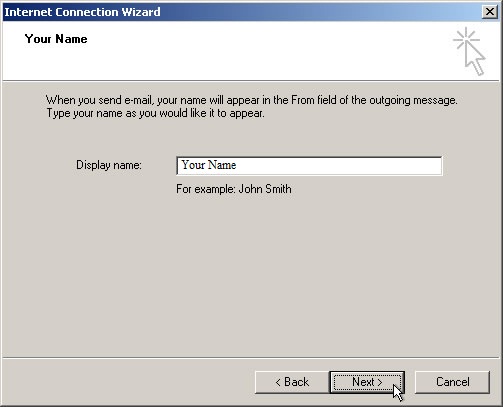
3. Enter your name. This will appear in the From field in any outgoing message that you send. Click "Next >."
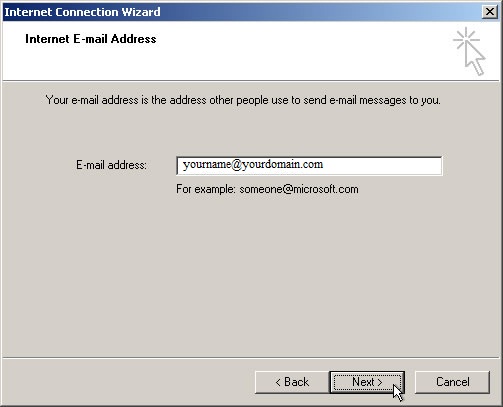
4. Enter you email address. Click "Next >."
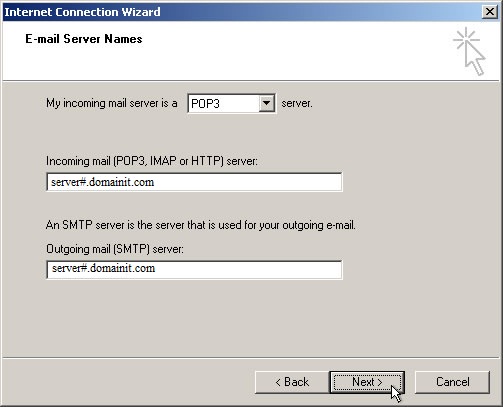
5. Next, you will need to enter your E-mail Server Names. First select "POP3" from the drop-down menu. (This should be selected by default.) Next enter the server name, "mail.domainit.com" for the incoming mail server. The outgoing mail server should be provided to you by your Internet Service Provider. Click "Next >."
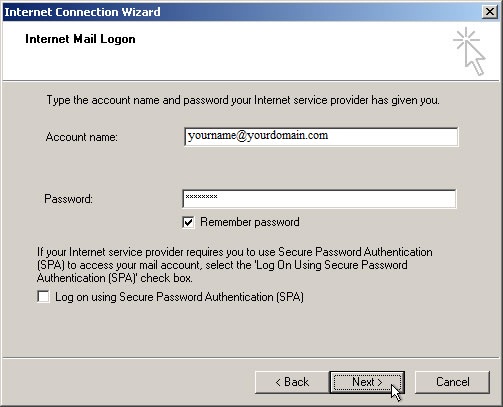
6. Enter your "Internet Mail Logon." Your Account name is your email address, and the password is the one that you specifyed when you registered this email account. Leave the "SPA" checkbox blank. Click "Next >."
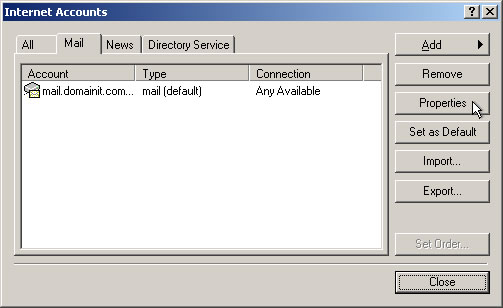
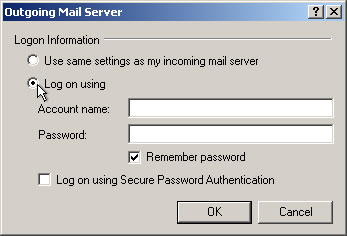
7. If your ISP requires you to use authentication for it's outgoing server, you need to enter that information provided to you by your ISP. To do so, go to the "Tools" menu and click on "Accounts." Select your email account and click on the "Properties" button.
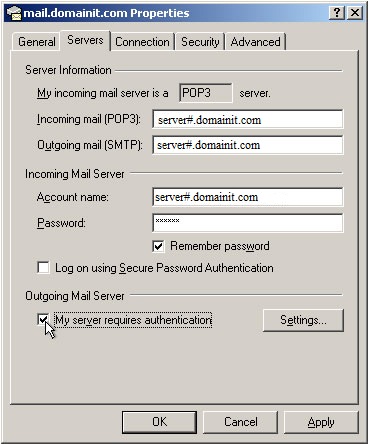
8. Next, click on the "Servers" tab in the Properties dialog. Check the checkbox "My server requires authentication." Then click on the "Settings..." button to the right of that checkbox."
9. Click on the "Log on using" button and enter the information provided to you by your ISP. Click "OK."
10. You're all done! To begin sending and receiving email, click on the "Send/Recv" icon in the toolbar. However, if you are traveling or find that your ISP has also blocked the use of port 26, you can also use submission port 587. If you are using an email program like Outlook, you can change your port number for your outgoing mail server by clicking on "Advanced settings" or "More Settings" from the "Advanced Settings" tab and changing the port number to 26 or 587 in the box that states "Outgoing server (SMTP)". Then click "OK" to save the change. *Please note that leaving email on the server counts towards the monthly mail quota for your account, and may cause delays in viewing email or an interruption in your mail service, should your monthly mail quota reach its limit. To prevent your mail quota from being exceeded, should you want to leave a copy of your emails on the server, empty your "trash" folder often to delete messages you no longer want, and download any emails that you wish to keep or archive at least once a month. **Please also note that while these steps are accurate for most versions of Outlook Express, your version may differ slightly. However, the mail account settings will be the same. | |
|
|
|


home :: account manager :: domain names :: web hosting :: email :: search engine submission :: website tools
about us :: testimonials :: affiliate program :: support :: contact us :: site map
© Copyright 1996-2025 DomainIt. All rights reserved. Service Agreements