


Help Desk
30 June 2025 06:52 PM

How to use Outlook to send and receive your mail
|
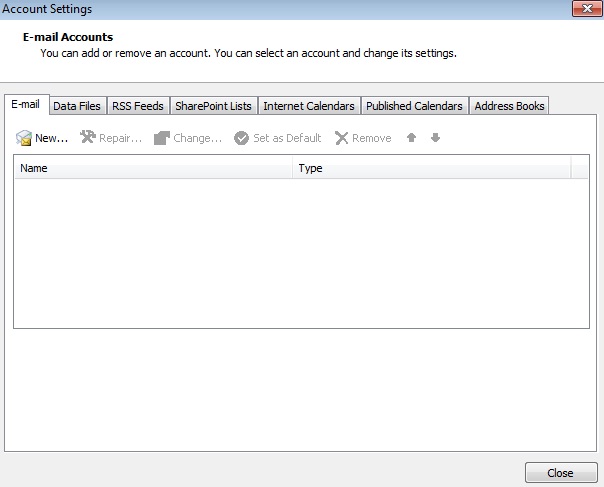
Once you have chosen Outlook as your email program, you can use the following step by step guide to help you configure it with the proper settings. 1. Launch Outlook. If this is the first time you have launched Outlook, you will see a box open to setup your email account. If you have previously used Outlook, you can access this box by going to the "Tools" menu and selecting "Account Settings". You can now create your new email account by clicking "New"under "Email".
Your Name: Your name as it will appear to the recipient E-mail Address: Your full email address in all lower case (ie you@yourdomain.com) Password: Your email address password Retype Password: Your email address password Then check off the box that says "Manually configure server settings or additional server types" and click "Next". 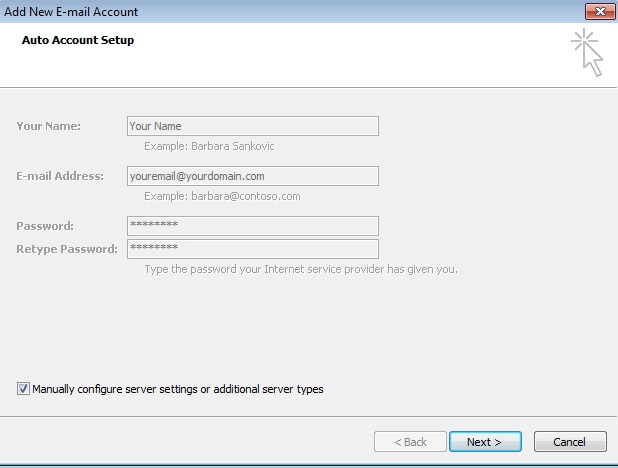 3. Choose "Internet E-mail" and click "Next". 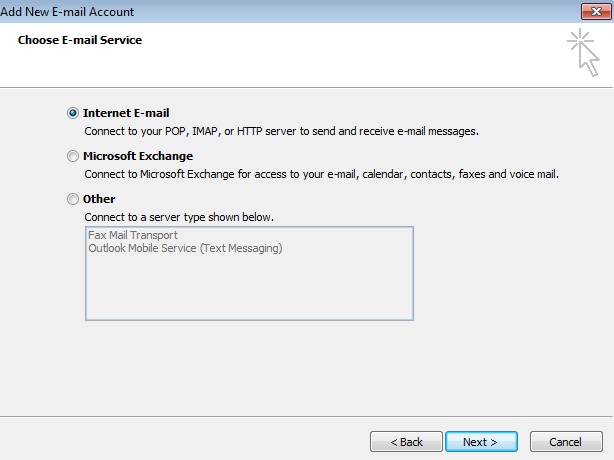 4. Next, you will enter your internet email settings: User Information: Enter your name and your full email address in all lowercase letters (ie you@yourdomain.com) Server Information: Enter in your incoming and outgoing mail servers. Your incoming and outgoing mail servers were provided to you in an email when you first signed up for the service. However, if you no longer have these settings, please contact us to find out what incoming and outgoing mail servers you should be using. Logon Information: Enter your full email address in all lowercase letters (ie you@yourdomain.com) as your User Name and the password that you specified when you registered your email account. Then click on the "More Settings" button. 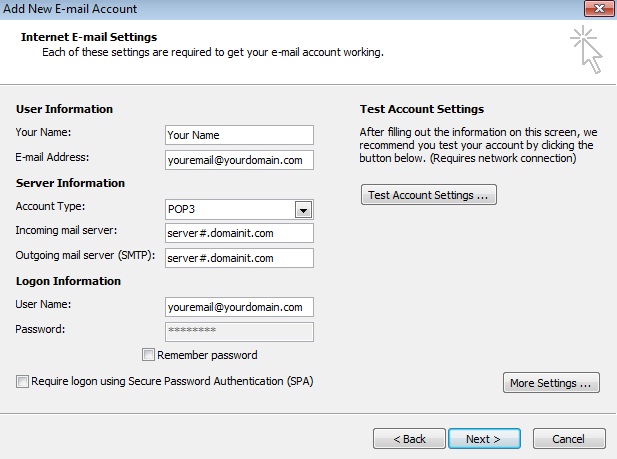  5. On the "Outgoing Mail Server" tab, make sure to check off "My outgoing mail server requires authentication" and choose the "Use same settings as my incoming mail server" option. Then click "OK" and hit "Next" to complete your setup.  You're all done! To begin sending and receiving email, click the "Send/Receive" icon in your toolbar. If you get an error that states "connection refused" then your ISP may be blocking the default port number for your outgoing mail server. If your ISP happens to block the default port number (port 25), you can use port 26 as an alternative port number. However, if you are traveling or find that your ISP has also blocked the use of port 26, you can also use submission port 587. If you are using an email program like Outlook, you can change your port number for your outgoing mail server by clicking on "Advanced settings" or "More Settings" from the "Advanced Settings" tab and changing the port number to 26 or 587 in the box that states "Outgoing server (SMTP)". Then click "OK" to save the change. *Please note that leaving email on the server counts towards the monthly mail quota for your account, and may cause delays in viewing email or an interruption in your mail service, should your monthly mail quota reach its limit. To prevent your mail quota from being exceeded, should you want to leave a copy of your emails on the server, empty your "trash" folder often to delete messages you no longer want, and download any emails that you wish to keep or archive at least once a month. | |
|
|
|


home :: account manager :: domain names :: web hosting :: email :: search engine submission :: website tools
about us :: testimonials :: affiliate program :: support :: contact us :: site map
© Copyright 1996-2025 DomainIt. All rights reserved. Service Agreements