


Help Desk
26 April 2024 05:00 PM

Upload Website for BeginnersGeneral Hosting Questions
|
Once you have signed up for a hosting plan, you can begin uploading websitecontent/ files to your FTP account. These can be website files that you created with a web design program or website files created for you by a web designer. Once you have your website files, you can use an FTP program to upload them to your FTP account on our servers. We suggest FileZilla because it is easy to use and you can download it for free! You can download FileZilla here: http://filezilla-project.org/ Once you download FileZilla, you can check out the following FAQ articles to help you get started: https://support.domainit.com/index.php?_m=knowledgebase&_a=viewarticle&kbarticleid=1261 https://support.domainit.com/index.php?_m=knowledgebase&_a=viewarticle&kbarticleid=1301 In order to upload your website files and folders to your FTP account, you will need to make sure you have the correct FTP login information: FTP Hostname FTP Username FTP Password Remote Directory: /public_html You can view the FTP login settings you received via email upon purchasing our hosting service and change the FTP password by following these steps: 1) Login to your Account Manager at https://www.domainit.com/myaccount 2) Click on the domain name you would like to manage 3) Under "Service Details" you can view the FTP Hostname, FTP Username, and Remote Directory 4) Then, to change the FTP password, click "Change Password" next to "FTP/Control Panel" In order to configure FileZilla, simply follow these steps: 1. Launch FileZilla. To configure your site, open the Site Manager by clicking on the icon in the top left corner.  2. Enter a name for your Website where it reads "New FTP site." 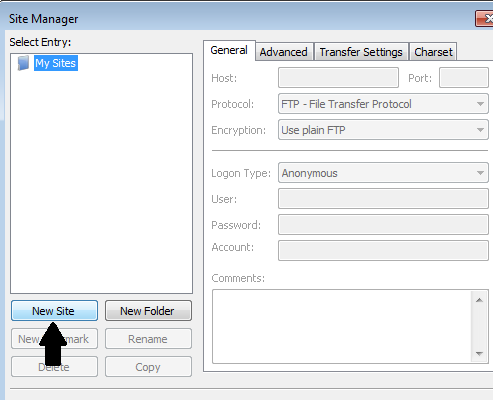 3. Next fill in the "Host" field with "ftp.yourdomain.com." The "Servertype" should be set to "FTP." Change the "Logontype" to "Normal." Then enter your FTP username and Password. 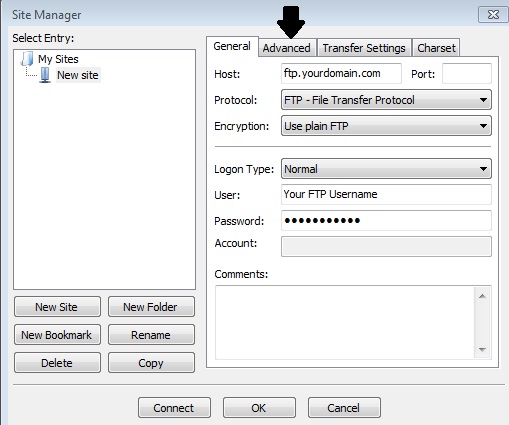 4. Next press the "Advanced..." button. Enter "/public_html" in the "Default remote directory" field. Press the "OK" button. 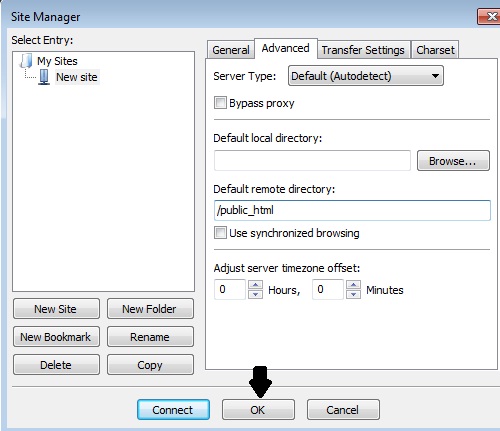 5. You're done! Press the "Connect" button on the bottom of the screen to connect to your server. Using FileZilla, uploading website files to your FTP account is as easy as locating the file on your local machine (on the left in FileZilla) and dragging and dropping the file into your /public_html directory on the right. Here are some suggestions to help you upload your website files and folders to your FTP account successfully: 1. Always make sure to upload your website files and folders directly to your /public_html directory, this is also known as your remote directory. 2. Your homepage should be named "index.html" in order for your website to find and display your website properly. 3. If you created your website using a file named "picture.jpg" remember to upload that same file with the exact same name. If you use a capital letter when uploading the file to your FTP account, your website will be unable to locate and display that file. For example, "picture.jpg" and "Picture.jpg" would be considered two different files by your website. 5. We do not suggest using spaces in file names. Please make sure to use an "_" if you would like spaces between words. For example, this would be an incorrect file name: "picture example 1.jpg". This would be a correct file name: "picture_example_1.jpg". 6. If your website design program created your website using specific folders such as "images" or "documents", make sure to upload those folders to your /public_html directory as well and place the necessary website files inside of them. In FileZilla, you can create a new folder or directory by right clicking in the remote section and choosing "Create Directory". Then enter the name of your new folder or directory and click "ok". | |
|
|
|


home :: account manager :: domain names :: web hosting :: email :: search engine submission :: website tools
about us :: testimonials :: affiliate program :: support :: contact us :: site map
© Copyright 1996-2024 DomainIt. All rights reserved. Service Agreements